
How To Build Forms Like a Pro
Whenever I submit a form online, I run into small UX issues that make the experience less smooth than it could be. A label that isn’t clickable, a keyboard that doesn’t show numbers, autofill that refuses to help.
Almost all of them are fixed by a browser feature that already exists. Here are the tips I’ve picked up for building a good form with as little JavaScript as possible — you might find you don’t need React or any framework at all.
The Naive Approach
Here is how a new React developer might create a form:
import React, { useState } from 'react';

export function SimpleForm() {
  const [name, setName] = useState('');
  const [age, setAge] = useState('');

  const SubmitForm = () => {
    // send to server ...
  };

  return (
    <div>
      <div>
        <span>Name</span>
        <input
          type="text"
          value={name}
          onChange={(e) => setName(e.target.value)}
        />
      </div>
      <div>
        <span>Age</span>
        <input
          type="number"
          value={age}
          onChange={(e) => setAge(e.target.value)}
        />
      </div>
      <div>
        <button onClick={SubmitForm}>Submit</button>
      </div>
    </div>
  );
}
This works, but it could be so much better.
1. Use an Actual Form Tag
The markup above is a pile of inputs in a div. Screen readers have no way of knowing this is a form, and the browser can’t help us with any of the behavior it normally provides for free.
Wrap it in a <form> tag. A nice bonus is that the form tag has an onSubmit callback:
import React, { useState } from 'react';

export function SimpleForm() {
  const [name, setName] = useState('');
  const [age, setAge] = useState('');

  const submitForm = (event) => {
    event.preventDefault();
    // send to server ...
  };

  return (
    <form onSubmit={submitForm}>
      <div>
        <span>Name</span>
        <input
          type="text"
          value={name}
          onChange={(e) => setName(e.target.value)}
        />
      </div>
      <div>
        <span>Age</span>
        <input
          type="number"
          value={age}
          onChange={(e) => setAge(e.target.value)}
        />
      </div>
      <div>
        <button type="submit">Submit</button>
      </div>
    </form>
  );
}
Two things to notice:
- The button is now
type="submit", so it triggersonSubmitinstead of its own click handler. Worth knowing: inside a form,type="submit"is the default. That’s why a stray “add another item” button inside a form will submit it unless you explicitly writetype="button". - By default the form sends its data to the server as a real request. To keep handling it on the client we call
event.preventDefault().
Just this small change already makes a massive difference:
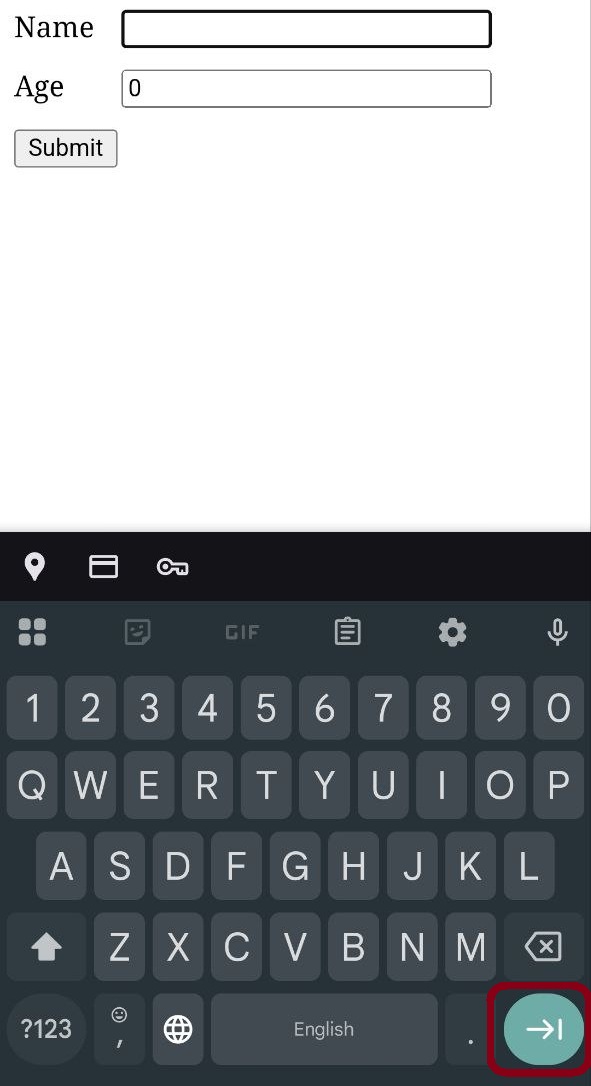
- A mobile user can move to the next field straight from their keyboard
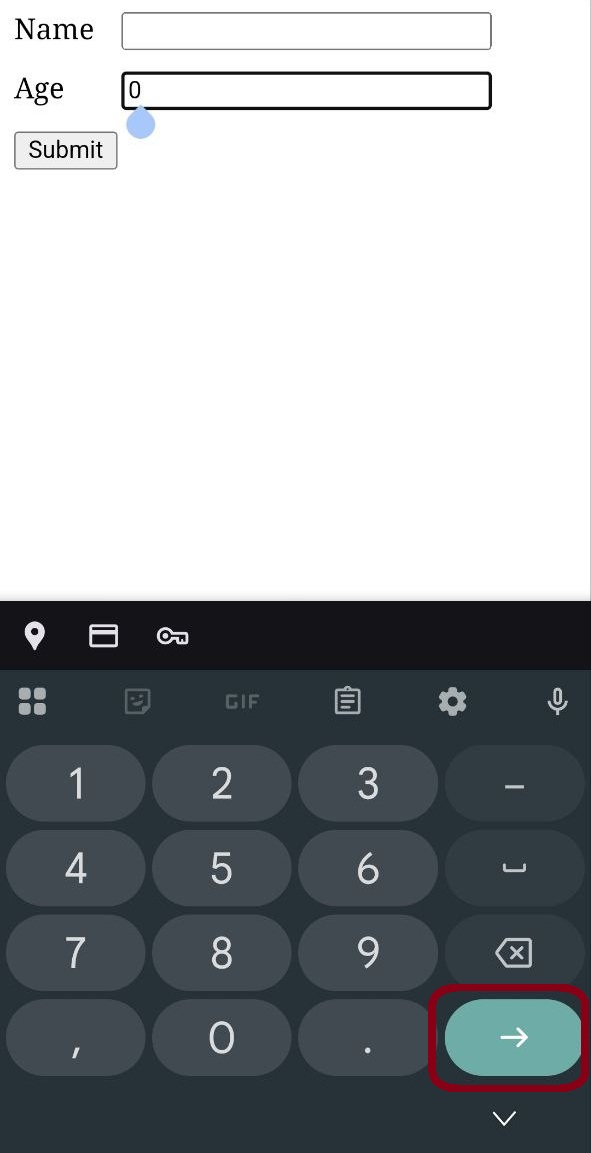
- On the last field, that key turns into a submit button
- A desktop user can submit by pressing enter — from any text field, not just the last one.
That third one is called implicit submission, and it’s the one people miss most. Two conditions to know about: the form needs a submit button (without one it only works if there’s exactly one text field in the form), and <textarea> is excluded, since enter there inserts a newline.
2. Proper Labels
Our form still isn’t accessible. For a screen reader to announce what each field means (name, age), we need real <label> tags. A <span> sitting next to an input is just decoration — nothing connects them.
The easiest way is to wrap the input:
<label>
  Name
  <input type="text" value={name} onChange={(e) => setName(e.target.value)} />
</label>
The browser automatically associates the label with the input it contains.
Unfortunately, this isn’t supported by older screen readers.
Wrapping also forces the label to sit right next to the input, which gets awkward to style. Linking them by id solves both problems:
<label htmlFor="name">Name</label>
<input
  id="name"
  type="text"
  value={name}
  onChange={(e) => setName(e.target.value)}
/>
Now the label can go anywhere in the markup.
The catch is that ids have to be unique on the page. If we reuse this component twice, we get two inputs with id="name" and the labels start pointing at the wrong field.
React 18 solved this with the useId hook. It gives us a stable string that’s unique per component instance, so we can namespace our ids with it:
import React, { useState, useId } from 'react';

export function SimpleForm() {
  const [name, setName] = useState('');
  const [age, setAge] = useState('');
  const id = useId();

  const submitForm = (event) => {
    event.preventDefault();
    // send to server ...
  };

  return (
    <form onSubmit={submitForm}>
      <div>
        <label htmlFor={`${id}-name`}>Name</label>
        <input
          id={`${id}-name`}
          type="text"
          value={name}
          onChange={(e) => setName(e.target.value)}
        />
      </div>
      <div>
        <label htmlFor={`${id}-age`}>Age</label>
        <input
          id={`${id}-age`}
          type="number"
          value={age}
          onChange={(e) => setAge(e.target.value)}
        />
      </div>
      <div>
        <button type="submit">Submit</button>
      </div>
    </form>
  );
}
One cool thing labels give you: clicking the label is the same as clicking the input. This matters a lot for tiny checkboxes.
A common mistake is adding margin to the label. That creates a dead zone between the label and the checkbox where clicking does nothing.
Use padding instead. The gap becomes part of the label’s click target, and it’s a more correct use of the box model anyway.
A placeholder is not a label. It disappears the moment the user types, it’s often too low contrast to read, and screen reader support for it is inconsistent. Use it for an example value (
e.g. 30), never for the field name.
3. Number Inputs Are a Trap
Our age field uses type="number", which behaves differently on nearly every platform.
On Android you get a numeric keyboard:
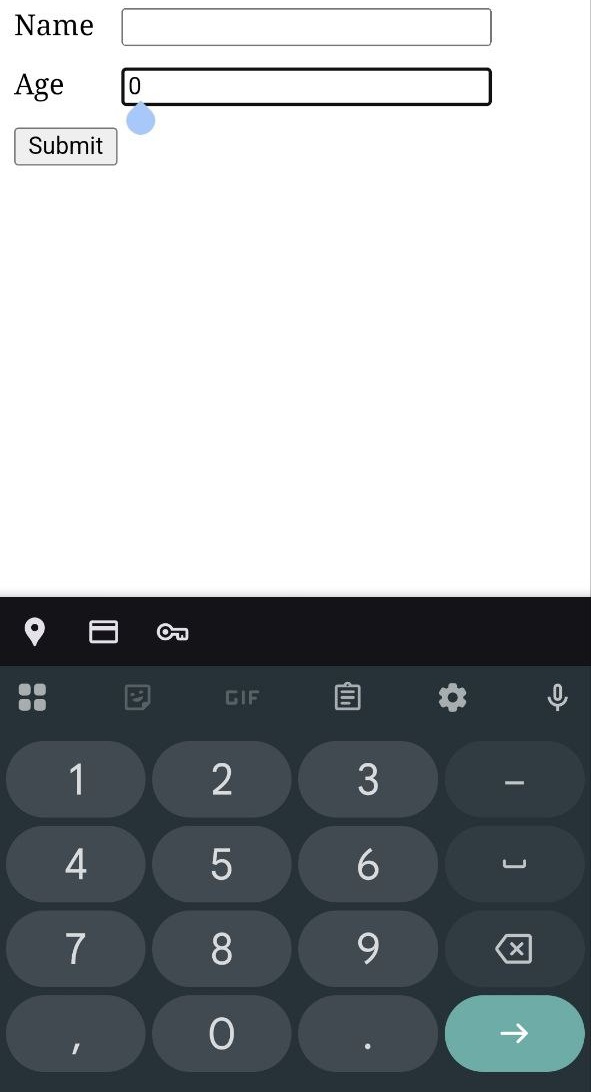
iOS has been far less consistent about it across versions. Rather than hoping for the right keyboard, ask for it explicitly with inputMode="numeric".
Desktop browsers disagree too. Chrome only lets you type digits and the letter e (not a joke — try it, e is valid scientific notation). Firefox and Safari let you type anything and only complain on submit:
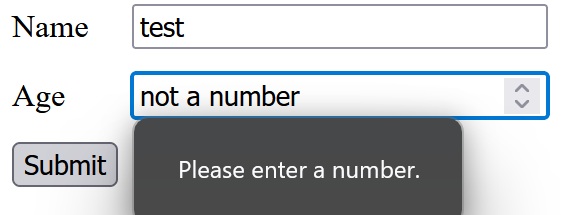
There are two more sharp edges people hit with type="number":
- If the value isn’t a valid number,
input.valuereturns an empty string. So the user sees12abcin the field while your state sees'', and your “required” check passes or fails for reasons the user can’t see. - Scrolling the mouse wheel over a focused number input silently changes the value. Users fill in an age, scroll down the page, and submit something else entirely.
The fix for all of it is to stop using type="number" and describe what we actually want:
<input
  type="text"
  inputMode="numeric"
  pattern="[0-9]+"
  value={age}
  onChange={(e) => setAge(e.target.value)}
/>
inputMode gets us the numeric keyboard on mobile, and pattern makes the browser block submission until the value is actually digits. The user can type whatever they want in any browser, but the form won’t go through until it’s a number. As a bonus, those ugly up/down arrows for incrementing the value are gone.
patternis skipped entirely when the field is empty, so pair it withrequiredif the field is mandatory.
And if you want to prevent non-numeric characters from ever appearing, filter in onChange:
<input
  id={`${id}-age`}
  type="text"
  inputMode="numeric"
  pattern="[0-9]+"
  value={age}
  onChange={(e) => {
    if (e.target.value.match(/^[0-9]*$/)) {
      setAge(e.target.value);
    }
  }}
  required
/>
Now the field behaves identically everywhere.
4. Name Your Fields and Let Autofill Work
This is the step I see skipped most often, and it’s the cheapest win on the list.
Every field needs a name. Without it the field is invisible to the browser’s autofill, and it won’t be included if the form is ever submitted natively. Then add an autocomplete token so the browser knows what the field is:
<input id={`${id}-email`} name="email" type="email" autoComplete="email" />
<input id={`${id}-tel`} name="tel" type="tel" autoComplete="tel" />
<input name="address" autoComplete="street-address" />
<input name="otp" autoComplete="one-time-code" inputMode="numeric" />
There’s a token for nearly everything — name, given-name, postal-code, cc-number, current-password, new-password. one-time-code is the magic one: it makes iOS and Android offer the SMS code straight from the keyboard.
Using type="email" and type="tel" is part of the same idea. You get the right mobile keyboard and, for email, free format validation.
Password managers rely on these attributes too, so getting them right is the difference between a signup form that fills itself in and one where the user gives up. And resist reaching for autocomplete="off" to “clean things up” — browsers largely ignore it for autofill anyway, and when they don’t, you’ve just made your form harder to use.
5. You Might Not Need JavaScript At All
If all we want is a contact form on a landing page, we can drop React entirely and make everything simpler, faster, and more SEO friendly.
Long before JavaScript existed, forms sent their data to the server with a POST request. That still works:
<form action="https://your.server.com" method="post">
  <label for="email">Email</label>
  <input id="email" name="email" type="email" autocomplete="email" required />

  <label for="message">Message</label>
  <textarea id="message" name="message" required></textarea>

  <button type="submit">Send</button>
</form>
This is where the name attribute earns its keep — it becomes the key in the submitted payload. No name, no data.
Zero JavaScript means nothing to load, nothing to hydrate, and nothing to break. The tradeoff is a full page reload on submit.
All that’s left is a backend to accept it. Thankfully someone already built that: FormSubmit gives you a form endpoint with no backend code at all.
<form action="https://formsubmit.co/example@gmail.com" method="post">
  ...
</form>
Point your action at their server with your email address, and every submission lands in your inbox. Most services like this also let you pass a redirect field so the user ends up on a proper thank-you page instead of a generic confirmation.
It took me about 10 seconds to set up and I never thought about it again, which is the highest compliment I can give any SaaS product.
6. Validation the Browser Does For You
We already have basic validation from pattern. HTML gives us plenty more before we reach for a library.
The simplest is required:
<input id="name" name="name" type="text" required />Try to submit without filling it in and the browser shows its own error message and focuses the field.
Between required, pattern, type="email", and min / max / minlength / maxlength, most forms are fully covered. If you genuinely need cross-field rules (“passwords must match”, “end date after start date”), that’s when something like react-hook-form starts to pay for itself.
We can also style fields by validation state with the :valid and :invalid pseudo-classes:
input:invalid {
  outline: 2px solid red;
}

input:valid {
  outline: 2px solid green;
}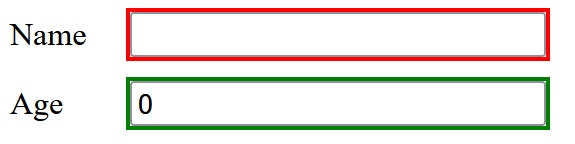
There’s a problem though: the first thing the user sees is a wall of red, because of course they haven’t filled anything in yet. Being yelled at before you’ve typed a single character is bad UX.
That’s what :user-valid and :user-invalid are for:
input:user-invalid {
  outline: 2px solid red;
}

input:user-valid {
  outline: 2px solid green;
}
Same styling, but only applied after the user has actually interacted with the field. These have been supported in every major browser since late 2023, and they degrade gracefully — older browsers just show no outline.
None of this replaces validating on the server. Client-side validation is a UX feature: it’s there to give fast feedback, not to protect your backend. Anyone can submit whatever they like straight to your endpoint.
Play Around With the Form Yourself
Everything above, in one form. Try submitting it empty, typing letters into the age field, or clicking the labels.
Summary
Modern browsers give us a lot for free: implicit submission, real keyboards, autofill, validation, and interaction-aware styling. None of it needs a library, all of it has great browser support, and every piece we didn’t write is JavaScript that can’t slow the page down or break.
The rule I keep coming back to: if the browser has a primitive for it, use the primitive.